Twitch: New feature helps turn stream clips into TikTok videos and YouTube shorts

Twitch has revealed a new feature, a vertical video editor to help turn stream clips into the vertical videos needed for TikTok, YouTube Shorts, and more. In one of the interviews, Twitch streamer SweeetTails discussed how she grew her following on TikTok by using her Twich clips.
Building an audience on other platforms such as TikTok and YouTube has become one of the most popular strategies to boost your Twitch stream in recent years. Twitch has provided users with instructions on how to modify and share videos on other social media sites.
READ MORE
Kick mocks Twitch, thanks purple platform for banning Amouranth and BruceDropEmOff
Kick vs Twitch: 4 differences in guidelines of these gaming, livestreaming platforms
Twitch drops new feature
Twitch published a video of the new and enhanced clip editor available on the site's creator dashboard in a tweet. “Edit & Share Vertical Clips It’s easier than ever to create social media videos of your best moments with the new Clip Editor! Convert clips to portrait mode Add your username Share to YouTube Shorts & more," they claimed. "Rolling out to everyone this week in the Clips Manager," they added.
Edit & Share Vertical Clips 🎬
— Twitch (@Twitch) May 11, 2023
It’s easier than ever to create social media videos of your best moments with the new Clip Editor!
📱Convert clips to portrait mode
💜 Add your username
🔗 Share to YouTube Shorts & more
Rolling out to everyone this week in the Clips Manager pic.twitter.com/VNu9fYZJmy
How to turn Twitch clips into vertical videos?
With only a few clicks you can turn Twitch's landscape clips into vertical videos to share on other social media platforms like TikTok and YouTube shorts. Follow the steps as instructed by Twitch.
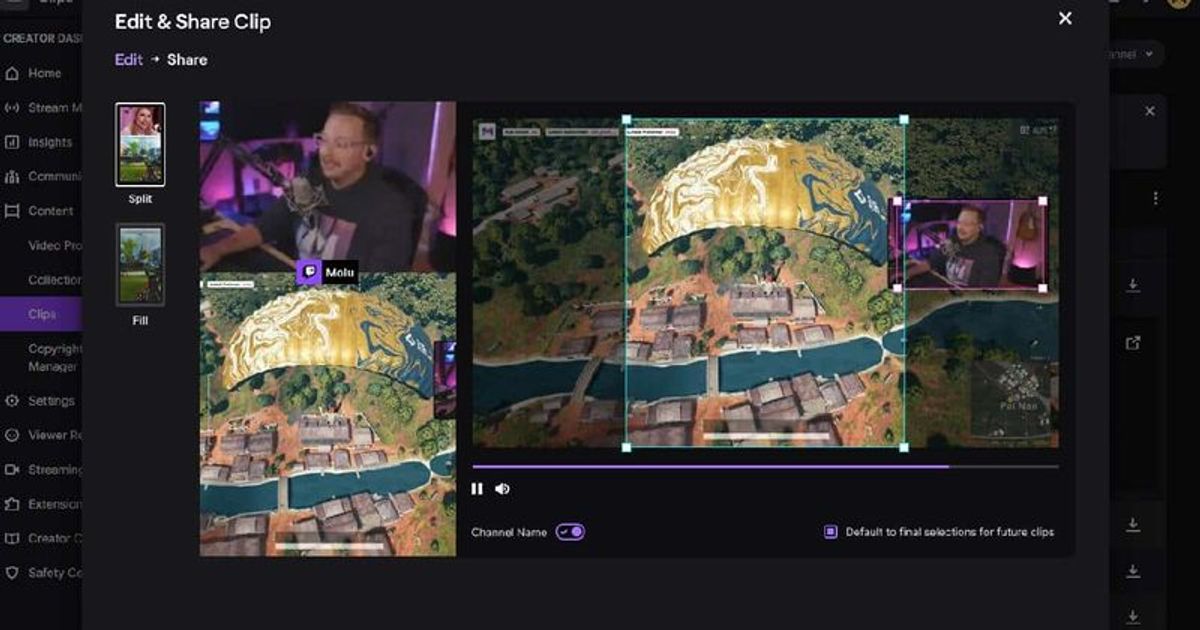
1. Visit your Creator Dashboard; Click Content -> Clips; Select a clip and click the Edit & Share Clip button to launch the Clip Editor modal.
2. Pick Your Layout: Choose between a full-screen or split-screen layout to show numerous face cams from a Guest Star feed, show face cam and gameplay to capture your reaction, and more.
3. Select your Frames: Drag and adjust the capture range using the control points on the rectangle(s) to your desired location. You’ll see a preview of your clip with your current selections on the left side of the editor. Check the Default to final selections box to make editing numerous clips in a row easier. We’ll remember your selection settings for next time!
4. Add your channel name: By including your Twitch channel name in your clip, you may show new viewers how to discover your streams. This option is enabled by default and can be disabled.
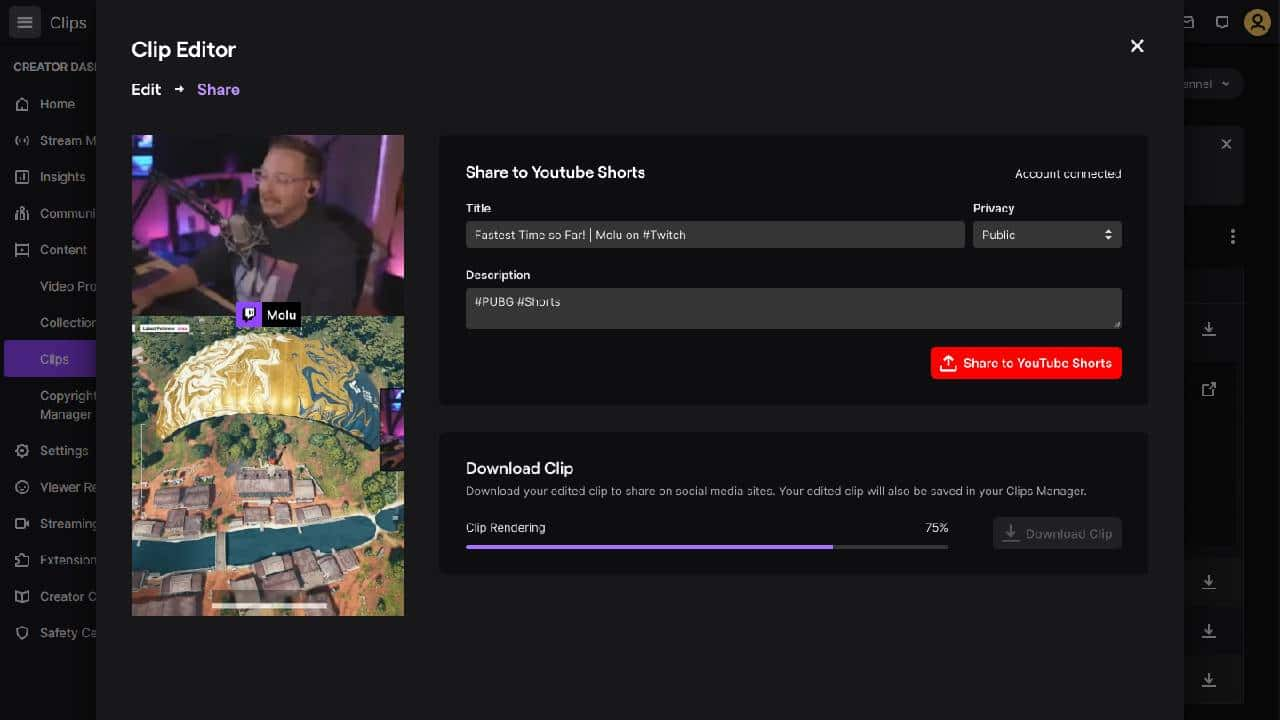
5. You're ready to share once you've finished editing. Go to the Share screen, and click Next. Download your video clip to share on social media, or directly share to YouTube Shorts if your Twitch account is linked to YouTube.
